This guide outlines a step-by-step approach to selecting the right wood filler for repairing cracks and splits in wood surfaces. It emphasizes the importance of choosing a filler that matches your specific needs to achieve a seamless repair that harmonizes with the wood’s natural look. By following the recommendations provided, you can ensure effective and aesthetically pleasing results in your woodworking projects.


Selecting and Applying Wood Filler: A Guide from This Old House
Assess the Damage
Inspect the cracks or splits in the wood carefully. Use a flashlight to illuminate the area, allowing you to see the full extent of the damage. Measure the size and depth of each crack, noting if it is wide enough to fit a finger or if it is merely a hairline fracture. Identify the type of damage: is it purely cosmetic, affecting only the surface appearance, or is it structural, compromising the integrity of the wood? Pay special attention to any signs of rot or insect infestation, as these issues require immediate attention.
Document your findings by taking notes or photos of the damaged areas. This will help you determine the appropriate type of wood filler needed for repairs. For small cracks, a lightweight wood filler may suffice, whereas deeper or wider splits may require an epoxy-based filler for added strength. Understanding the nature of the damage ensures that you choose the right materials and repair methods for a lasting fix.
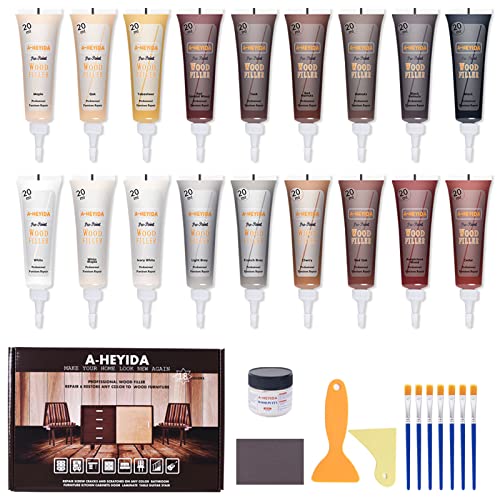
Choose the Type of Wood Filler
Choose the appropriate type of wood filler based on the damage assessed. Consider latex fillers for minor cosmetic repairs, as they are easy to apply and sand down, making them ideal for small holes or scratches. Ensure the wood surface is clean and dry before applying the filler. Use a putty knife to spread the latex filler evenly into the damaged area. Smooth it out to create a level surface, and allow it to dry according to the manufacturer’s instructions.
For larger cracks or structural damage, opt for epoxy fillers due to their superior strength and durability. Prepare the epoxy mixture according to the product instructions, mixing the resin and hardener thoroughly. Fill the crack generously, ensuring the epoxy seeps into the damaged area for a strong bond. Use a putty knife to shape and smooth the surface, removing any excess filler. Allow the epoxy to cure completely, which may take longer than latex fillers, before sanding to achieve a flush finish with the surrounding wood.
Consider the Wood Species
Evaluate the wood species you are working with by examining its grain pattern and color. Identify whether it is a hardwood like oak or maple, or a softwood such as pine or cedar. Research the specific characteristics of your wood type, noting any unique features that distinguish it from other species. Gather wood filler options and compare their appearance to your wood species, focusing on grain replication and color matching.
Select a wood filler that can be stained or finished to match your wood. Opt for a product designed for the specific type of wood you have, ensuring it will blend seamlessly with the surrounding area. Test the filler on a small, inconspicuous section of the wood if possible, applying the stain or finish afterward to see how well it matches. Adjust your choice if necessary, and proceed with the repair, keeping in mind that a well-chosen filler will enhance both the functionality and aesthetics of your wood project.
Evaluate Drying Time
- Check the manufacturer’s instructions for the specific wood filler you are using. Look for the recommended drying time, as it can vary significantly between products.
- Assess your project needs. If you require a quick repair, choose a filler labeled as quick-drying. These typically allow for faster application and finishing.
- Consider the drying time if you plan to apply multiple layers. Some fillers may dry quickly but need additional time for sanding or painting.
- Test the surface before proceeding. Lightly press your finger on the filler to gauge its firmness. If it feels tacky, allow more time to dry.
- Plan your work schedule accordingly. If the filler takes longer to dry, factor in the extra time needed before applying additional layers or finishing touches.
Read Product Reviews
Seek out product reviews and ratings for the wood fillers you are considering. Focus on user feedback that highlights ease of use, effectiveness, and durability. Pay attention to how other users describe their experiences, as this can reveal important information about the performance and reliability of the product. Look for common themes in the reviews, such as whether the wood filler is easy to apply, how well it adheres to different surfaces, and its ability to withstand wear and tear over time.
Analyze both positive and negative feedback to get a comprehensive view of the product. Examine the ratings closely; a high rating from numerous reviewers generally indicates a trustworthy product. Take note of any recurring issues mentioned, as this may signal potential problems you could encounter. Engage with the reviews by asking questions if possible, or by checking if the manufacturer provides responses to customer queries. This thorough approach will equip you with valuable insights that can guide your final decision.
Final Thoughts on Wood Fillers
In conclusion, choosing the right wood filler for cracks is essential for achieving effective and visually appealing repairs. By carefully evaluating the extent of the damage, selecting the right type and color, considering drying times, and consulting product reviews, you can ensure a successful outcome. With the right approach, your wood repairs will not only restore functionality but also enhance the overall aesthetics of your projects. Happy repairing!

Hi, I’m Ethan Oakley, a lifelong woodworking enthusiast and the founder of PureWoodArt.com. My journey into woodworking began in my grandfather’s workshop, where I spent countless hours learning the craft and developing a deep appreciation for the beauty and versatility of wood. Over the years, I’ve honed my skills and expanded my knowledge, from traditional joinery techniques to modern woodworking tools and methods. Let’s craft something amazing together!
I’m not sure I agree with the drying time section. Sometimes, even if a product says it dries quickly, it doesn’t mean it’s fully cured. Has anyone else experienced that?
You’re right; there’s a difference between drying and curing times. Some fillers might feel dry to the touch quickly but take longer to fully set. It’s always a good idea to check the manufacturer’s instructions for the most accurate info.
I recently fixed some cracks in my vintage dresser using Elmer’s Carpenter’s Wood Filler. It was super easy to apply, and I was amazed at how well it blended with the wood after staining! Definitely a game changer for my DIY projects.
That’s fantastic! Elmer’s is a great choice for DIY enthusiasts. Blending it with stain can be tricky, so it’s awesome that it worked out well for you. It sounds like you’re on your way to becoming a pro at this!
Hey, I was wondering what the best type of wood filler is for outdoor furniture? I’ve got some cracks in my patio table and I want something that can withstand the weather. Any suggestions?
Great question! For outdoor furniture, I’d recommend using a polyurethane-based wood filler. It’s durable and resistant to moisture, making it ideal for outdoor use. Just make sure to apply a good sealant afterward for extra protection!
I just used Minwax High-Performance Wood Filler on my old chair, and it worked wonders! I sanded it down, applied the filler, and you can’t even tell where the crack was anymore. So happy with the results!
That’s awesome to hear! Minwax is definitely a reliable choice, and it’s great that you had a successful repair. Don’t forget to share a before-and-after pic next time!